| Home | Freeware | Tutorials | Music | Photos |
How to Rip a video DVD (Or How To Copy A Film On Your PC)
Introduction
If you have a look at the structure (in terms of files and folders) of a DVD-video disk put in the optical drive of your PC, you'll find 2 folders : AUDIO_TS and VIDEO_TS. The AUDIO_TS folder is empty (it is used for DVD-audio disks) while the VIDEO_TS folder contains files :
- Video_ts.bup
- Video_ts.ifo
- Video_ts.vob
- Vts_01_0.bup
- Vts_01_0.ifo
- Vts_01_0.vob
- Vts_01_1.vob
- Vts_02_0.bup
- Vts_02_0.ifo
- Vts_02_0.vob
- Vts_02_1.vob
- Vts_02_2.vob
- ...
What you will need to rip a DVD-video disk ?
Stuff You'll Need
From a hardware point of view, a drive able to read a DVD is necessary. So any DVD drive or
DVD burner will do.
As for the software, you'll need a DVD ripper.
In our section presenting the "Best Video Rippers and Encoders"
you'll find some useful tools, all for free. The most known are DVD Shrink, FormatFactory, Free Movie DVD Maker or Free Video Converter but
K9Copy (Linux) is an excellent soft.
Our preferred is
DVD Shrink. It has very nice features : DVD Shrink can backup your DVD discs or re-author them before copy.
Re-authoring your DVD allows to suppress the subtitles you don't want, to choose the language you want to keep, to suppress
the bonus ... : thus you can reduce the amount of data you want to copy and make your movie able to fit onto a single sided/single
layer recordable DVD-/+R disk.
Set DVD Shrink Parameters
We suppose you have just downloaded DVD Shrink. If you haven't, just do it using the following link
Download DVD Shrink.
It's a Zip file so use an unzip utility to decompress the file (see our section
Zip/Unzip
for free software). After the file is decompressed, double-click on the exe-file to run the setup.
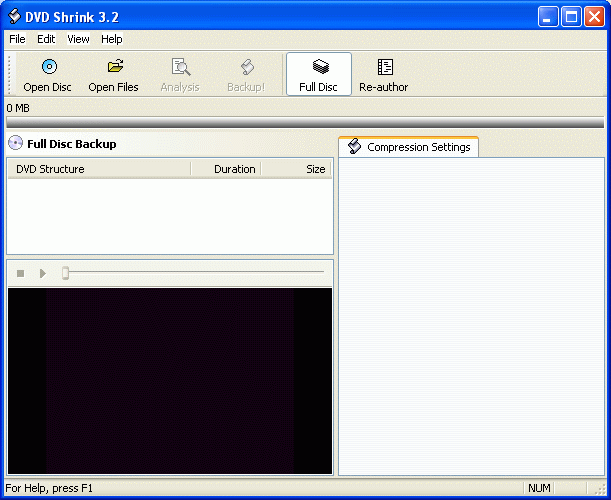
Once the installation is completed, insert a DVD-video disc in your optical drive and run DVD Shrink. You
should have something like :
In the "Edit" menu, choose the "Preferences" entry, as shown below :
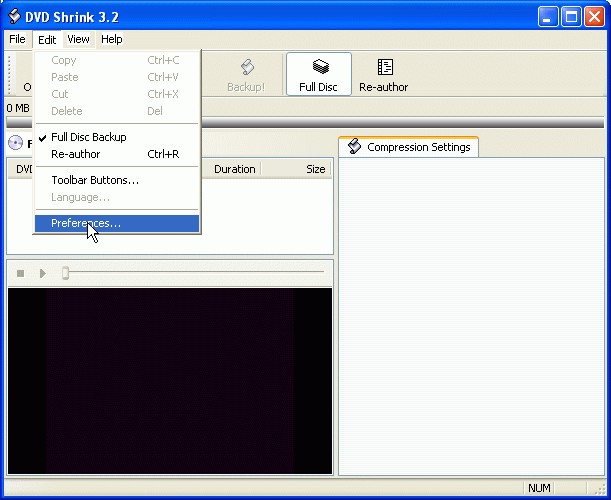
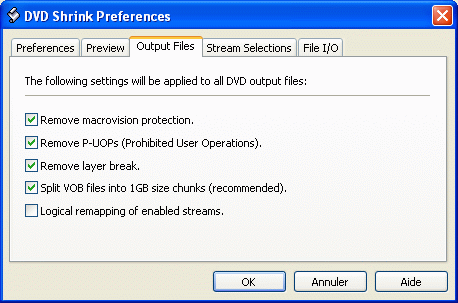
This window let you set some different parameters (Preferences, Preview, Output Files ...). For each of these parameters, you have to make a choice. Just look at our settings.

The copy must fit onto a single sided/single layer
recordable DVD disc (4.7 Gb)
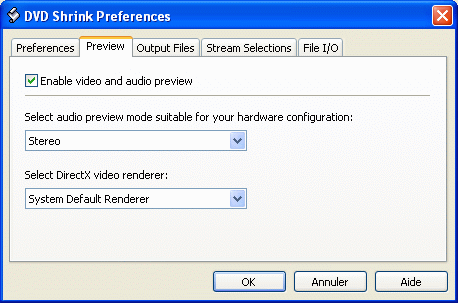
If you have a 5.1-channel surround sound system,
change "Stereo" to "5.1"
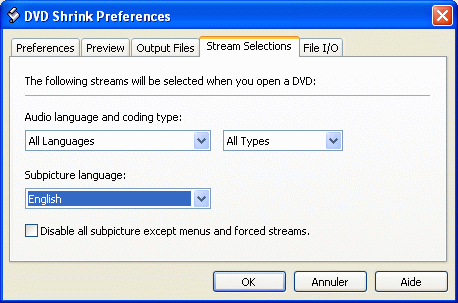
All languages selected
English subtitles only
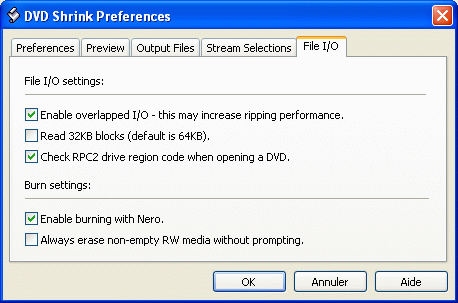
Check "Enable burning with Nero" only if you
burn with Nero just after the encoding step
When done, click "OK" to close the window preferences and go back to the main window. You are ready to rip your DVD !
Ripping with DVD Shrink
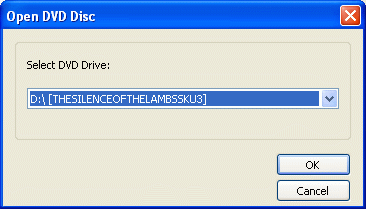
Now click on the "Open Disk" button : if you have many drives, just select the drive containing the DVD you want to rip and click "OK".
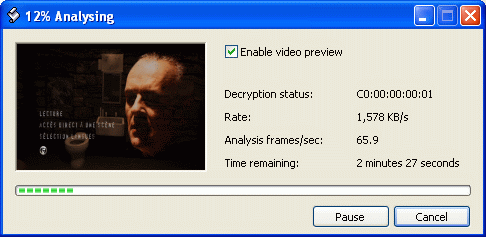
First of all, DVD Shrink performs a quick analysis. It can take a few minutes : just wait.
When done, you can see the structure of your DVD.
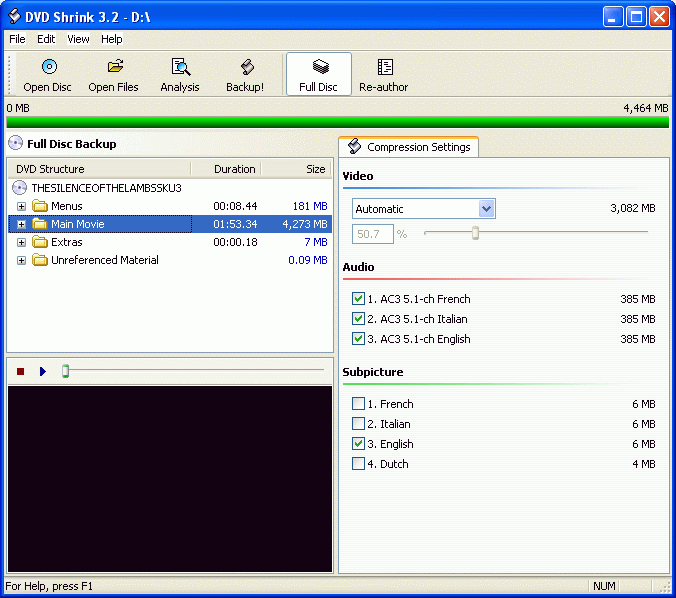
By default DVD Shrink computes the compression ratio automatically
("Automatic") so that the copied DVD would fit on a single-layer recordable DVD
English subtitles only
(as wanted)
You can verify that all languages are selected as choosen in "Stream Selection Setting",
while only english subtitles stay. As you can see, by default DVD Shrink set the compression ratio automatically
("Automatic") so that the copied DVD would fit on a single DVD-R/+R as choosen in the "Preferences Settings"
window. Here the compression ratio is 50.7% : that is to say DVD Shrink would have to shrink the files we want to
copy by a factor 2 to make them fit onto a single sided/single layer recordable DVD-/+R disk.
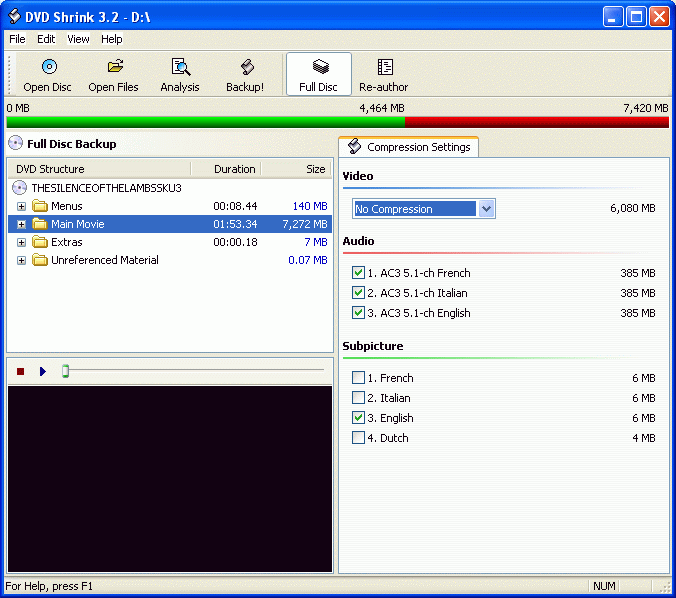
If you think this compression ratio is too high, you have two choices. One solution is to re-author your DVD
to keep only the items you really want. This solution is explained later. Another solution is to keep the whole thing,
applying no compression, and burn it on a dual-layered disc. In order to do this just change "Automatic" to "No Compression"
in the drop-down menu. Now, you can see the ripped DVD will need more than 7.4 Go.
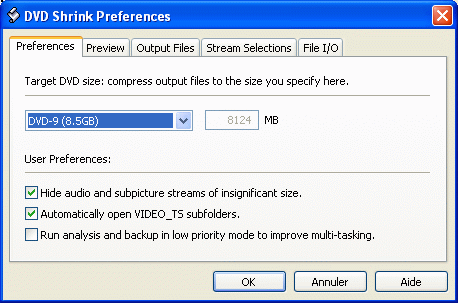
In this case, if you want to backup the whole DVD, it is necessary to change "DVD-5" to "DVD-9" in the "Preferences" window as shown below.
When your mind is set (compression or not ?), everything is ready to start the process so just click on
the "Backup" button and
read the next !.
Eventually, you want to re-author your DVD because you don't want to burn it onto a dual-layered disc and you really find
that the compression ratio is too high. So let me show you how to do that ...
See the next !