
| Home | Freeware | Tutorials | Music | Photos |
How to Rip a DVD with DVD Shrink
Rip without re-authoring
We suppose DVD Shrink is already installed. If not, just do so reading the first part of this tutorial. In the previous steps, we decided to backup the DVD with a compression ratio of 50.7% to make it fit on a single sided/single layer recordable DVD-R disc. The configuration is shown below.
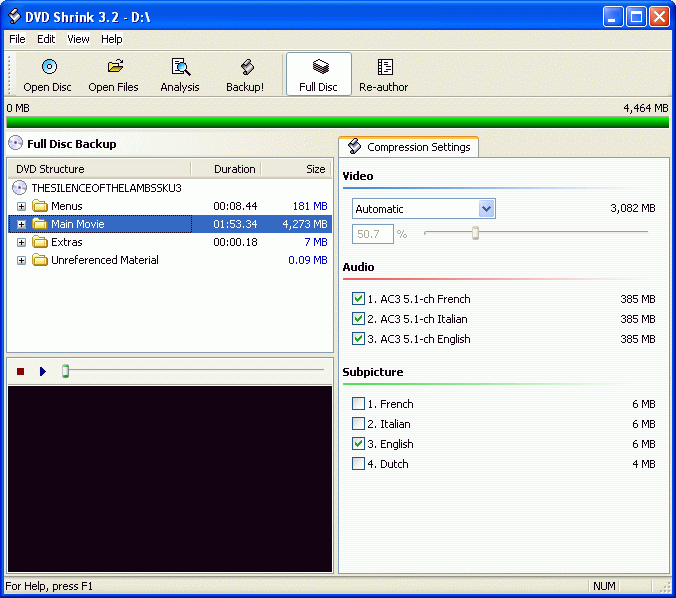
Just click on the "Backup" button or in the "File" menu, choose "Backup...". The "Backup DVD" window opens and let you set some parameters:
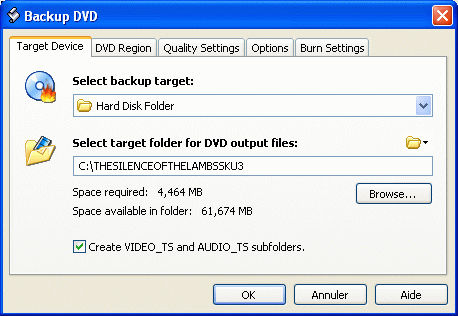
Browse your hard drive to select the folder where
the VIDEO_TS and AUDIO_TS subfolders will be saved.
Check the box "Create VIDEO_TS and AUDIO_TS subfolders". This helps to increase compatibility with old DVD players.
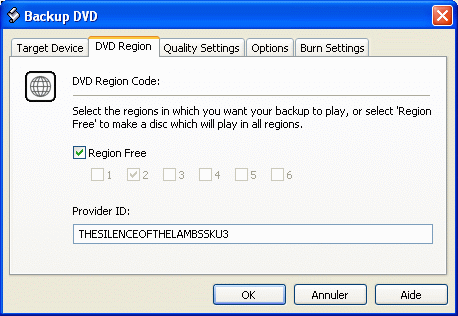
Check the box "Region Free".
Your DVD will play on all DVD
players in any country.
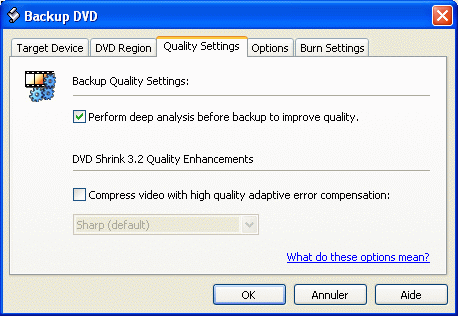
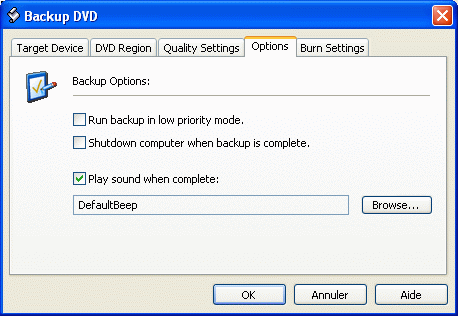
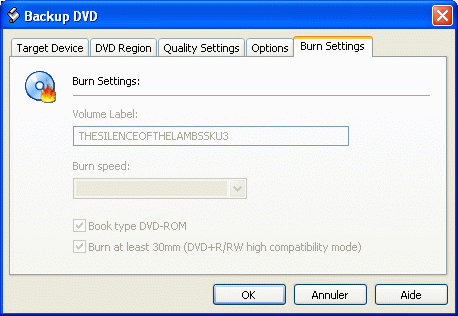
When done, click "OK" to close the window. First, DVD Shrink performs a deep analysis then begins to encode and copy. The total duration depends on your hardware (memory, processor) and your settings.
Re-authoring your video DVD
The configuration is shown below :

You really find (and you are right) that the compression ratio is too high. You think that quality of the saved files will be poor. You decide to drop the audio streamings you don't want to keep and all the extras. It is then necessary to re-author the DVD. Just click the "Re-author" button or in the "Edit" menu, choose "Re-author". It looks something like this :
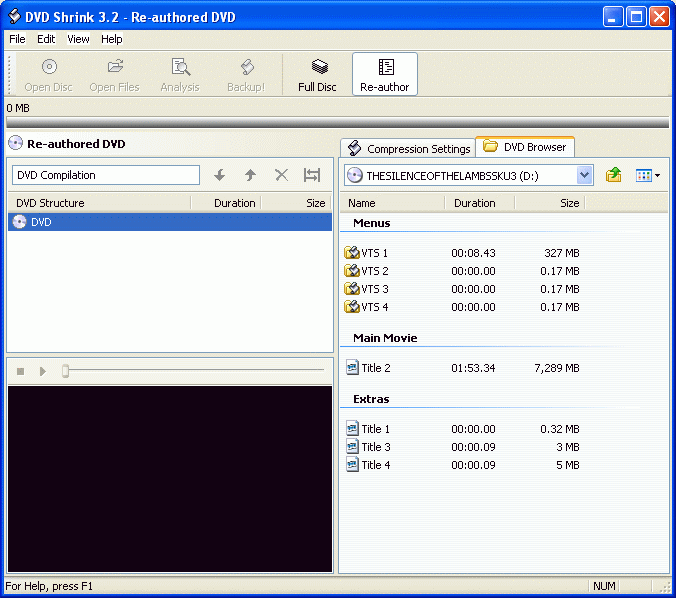
In the right pane of the window, there are the main movie, the menus and extras. Just drag-and-drop the main movie (Title 2 here) to add it to the DVD folder in the left pane :
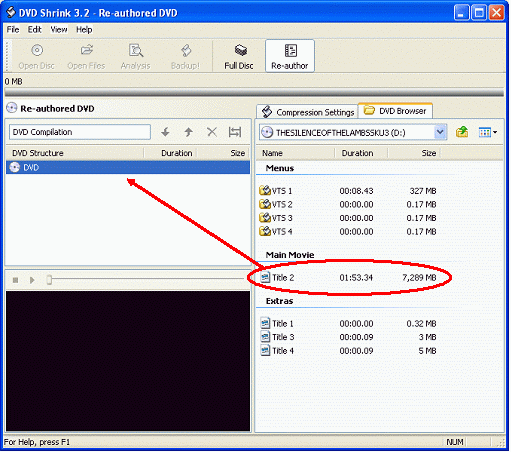
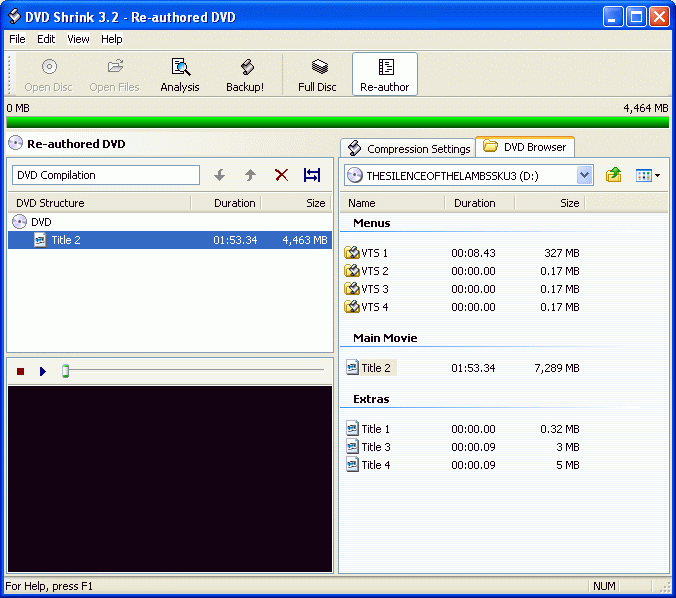
When the main movie is in the re-authored DVD folder, you have to choose the stuff you want to keep. In the right pane of the window, select "Compression Settings".
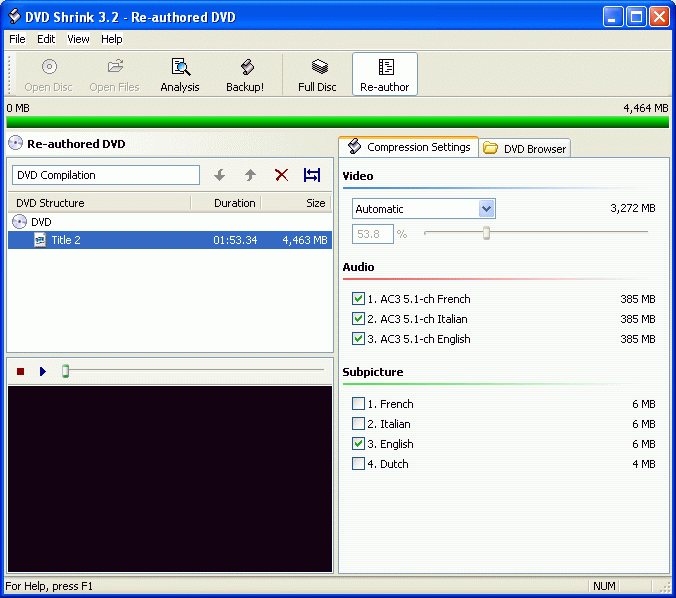
Uncheck all audio except AC3 5.1-ch English. Uncheck all subtitles if necessary. Doing so, we just increased the compression ratio from 53.8% to 66.6%.
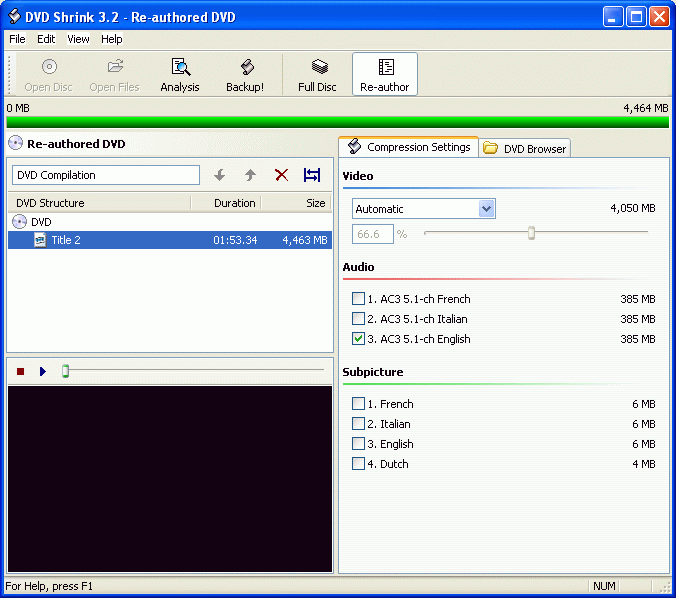
When done, just click on the "Backup" button or in the "File" menu, choose "Backup...". The "Backup DVD" window opens and let you set some parameters :

Browse your hard drive to select the folder where
the VIDEO_TS and AUDIO_TS subfolders will be saved.
Check the box "Create VIDEO_TS and AUDIO_TS subfolders".This helps to increase compatibility with old DVD players.

Check the box "Region Free".
Your DVD will play on all DVD
players in any country.


When done, click "OK" to close the window. First, DVD Shrink performs a deep analysis then begins to encode and copy. The total duration depends on your hardware (memory, processor) and your settings.
* AUDIO_TS : empty
* VIDEO_TS : containing bup, ifo and vob files


